Die Hard Battery Charger: A Comprehensive Owner’s Manual Guide
This manual provides essential guidance for safely and effectively operating your Die Hard battery charger, ensuring optimal performance and longevity.
Understanding its features, safety precautions, and troubleshooting steps is crucial for successful battery maintenance, as detailed within.
Welcome to the world of reliable power solutions! Your Die Hard battery charger is a robust tool designed to restore and maintain various battery types, ensuring dependable performance for your vehicles and equipment. This charger isn’t merely a device; it’s an investment in the longevity of your power sources.
Understanding its capabilities, from standard to potentially fast or trickle charging modes, is key. This manual serves as your comprehensive guide, detailing safety precautions, component identification, and step-by-step procedures. Proper usage, as outlined herein, will maximize efficiency and prevent potential issues, keeping you powered up and ready to go.
Understanding Battery Types & Compatibility
Your Die Hard charger is engineered for versatility, but compatibility is crucial for optimal charging and battery health. Commonly supported types include lead-acid (flooded, AGM, and gel cell), often found in cars, motorcycles, and boats. However, lithium-ion batteries require specific chargers and are generally not compatible with standard lead-acid chargers like this one.
Always verify your battery’s voltage (6V, 12V, or 24V) before connecting. Incorrect voltage can cause damage. Refer to your battery’s specifications or consult a professional if unsure. Using the wrong charger or settings can lead to reduced battery life or even failure.
Safety Precautions & Warnings
Prioritize safety when operating your Die Hard battery charger. Always work in a well-ventilated area, as batteries release explosive hydrogen gas during charging. Never smoke or create sparks nearby. Wear safety glasses to protect your eyes from potential acid splashes. Disconnect the charger from the power outlet before making any connections or disconnections to the battery.
Avoid charging damaged or frozen batteries. Ensure the charger is placed on a stable, dry surface. Do not operate the charger with a damaged cord or plug. If the charger overheats, immediately disconnect it and allow it to cool.
Charger Component Identification
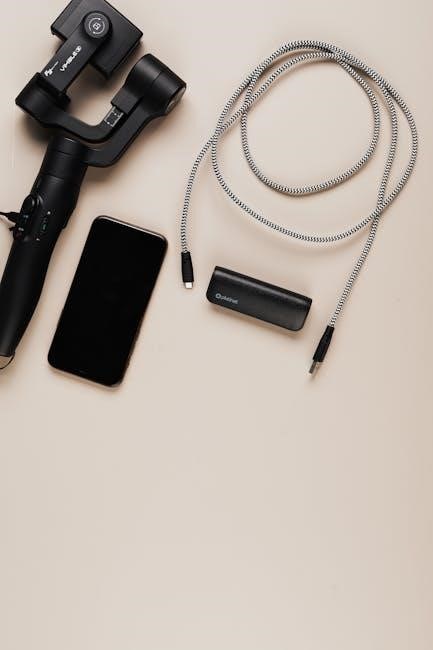
Familiarize yourself with the Die Hard battery charger’s key components. This includes the AC power cord, connecting cables with clamps (positive/red, negative/black), and the charger housing itself. Locate the LED indicator lights, which display charging status. Identify the control knobs or switches used for selecting charging modes (standard, fast, trickle) and amperage settings.
Understand the function of each component before operation. The charger’s die (silicon unit) is integral to its function, though not directly user-accessible. Proper identification ensures safe and effective use.
LED Indicator Lights Explained
The Die Hard battery charger utilizes LED indicators to communicate its operational status. A solid green light typically signifies charging is in progress, while a flashing green may indicate a trickle charge or maintenance mode. A red light often signals an error condition, such as reversed polarity or a faulty battery.
A solid yellow light could mean the charger is in standby, or a charging cycle is complete. Understanding these visual cues is vital for monitoring the charging process and addressing potential issues promptly. Refer to the full manual for specific light patterns.
Control Knobs & Switches Functionality
Your Die Hard battery charger features control knobs and switches for precise operation. The charging rate selector allows you to choose between standard, fast, or trickle charging modes, adjusting amperage output. The voltage selector, if equipped, enables compatibility with 6V or 12V batteries.
The power switch initiates or terminates the charging cycle. Familiarize yourself with each control’s function before use. Incorrect settings can damage the battery or charger. Always consult the full manual for detailed instructions and safety guidelines regarding these controls.
Preparing Your Battery for Charging
Before connecting your Die Hard charger, proper battery preparation is essential for optimal charging and safety. Begin by visually inspecting the battery for cracks or leaks; do not charge a damaged battery. Cleaning battery terminals is crucial – corrosion hinders charge transfer. Use a wire brush or terminal cleaner to remove buildup.
Checking battery voltage with a voltmeter confirms its condition. A significantly low voltage indicates a deeply discharged or potentially sulfated battery. Ensure adequate ventilation during charging, as batteries can release explosive gases.
Cleaning Battery Terminals
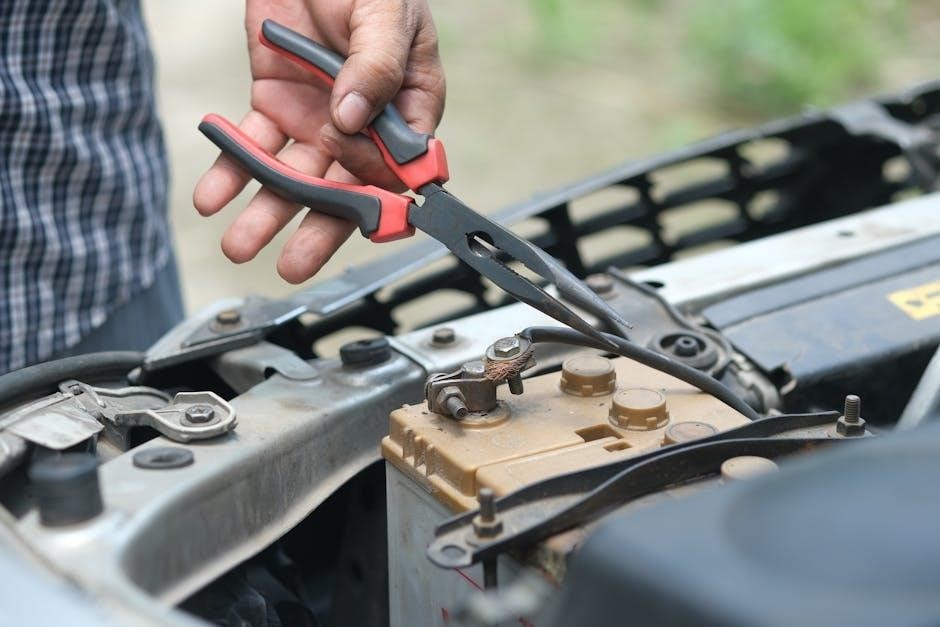
Corroded battery terminals impede the charging process, reducing efficiency and potentially damaging both the battery and the Die Hard charger. To clean, disconnect the battery cables – negative first! Mix baking soda with water to create a paste, then apply it to the terminals.
Let it fizz for a few minutes to neutralize the corrosion. Use a wire brush or terminal cleaning tool to scrub away the residue. Rinse with clean water and dry thoroughly. Applying a terminal protectant after cleaning prevents future corrosion, ensuring a solid electrical connection.
Checking Battery Voltage
Before charging, assessing your battery’s voltage is crucial for selecting the appropriate charging mode and identifying potential issues. Use a multimeter set to DC voltage. Connect the red probe to the positive terminal and the black probe to the negative terminal.
A fully charged 12-volt battery should read around 12.6 volts or higher. Readings below 12.4 volts indicate a partially discharged battery, while below 12.0 volts suggests a significantly discharged or potentially damaged battery. Accurate voltage readings guide optimal charging and prevent overcharging.
Charging Procedures: Step-by-Step
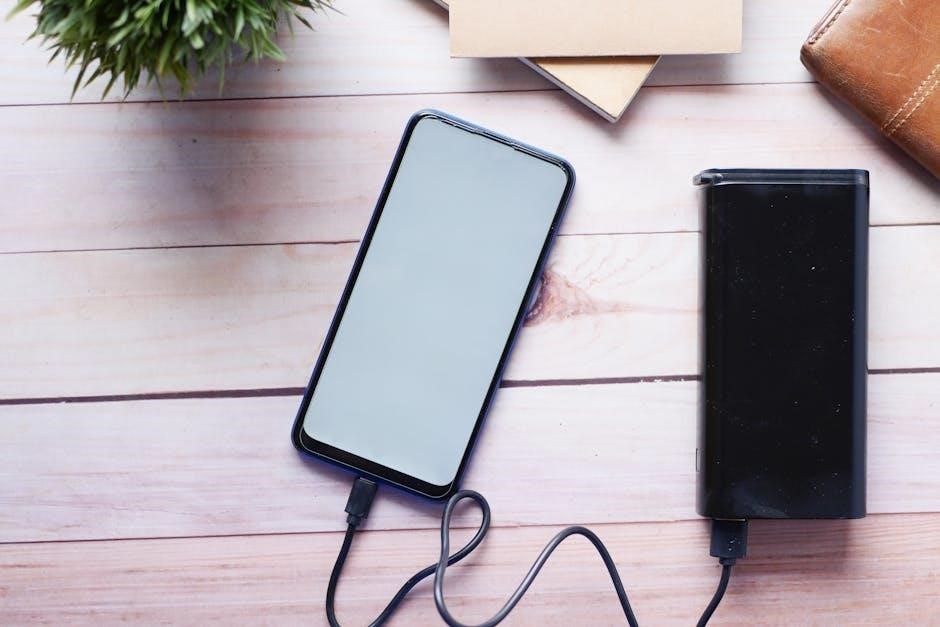
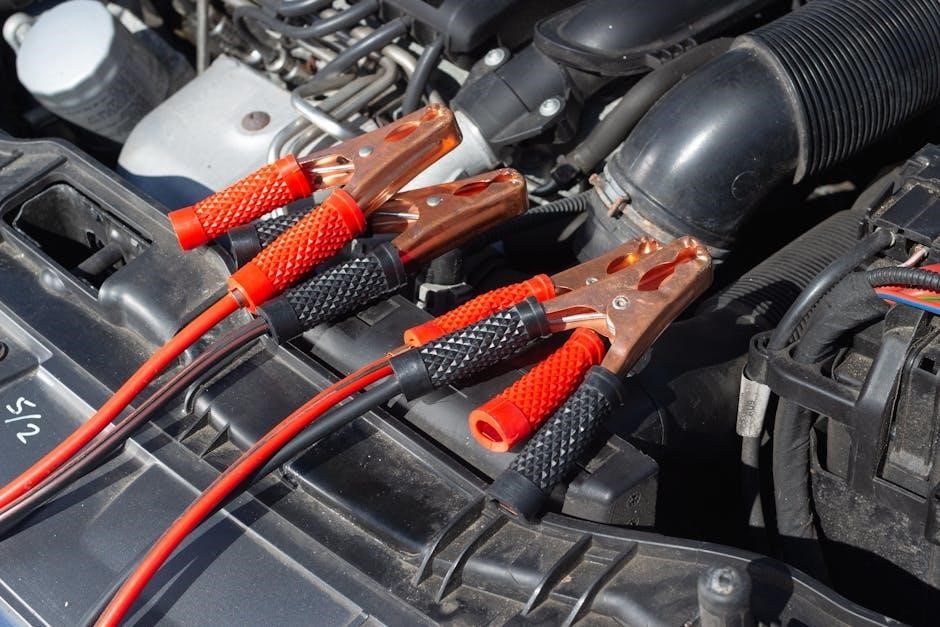
Begin by connecting the charger’s positive (red) clamp to the battery’s positive terminal and the negative (black) clamp to the negative terminal. Ensure a secure connection to prevent sparking. Select the appropriate charging mode – Standard, Fast (if available), or Trickle – based on the battery’s condition and voltage.

Turn on the charger and monitor the charging process. Refer to the LED indicators to track progress. Once fully charged, disconnect the charger, starting with the negative clamp, before storing or using the battery.
Standard Charging Mode
Standard charging is ideal for deeply discharged or older batteries, providing a slower, more controlled charge. This mode minimizes the risk of overheating and sulfation. Select the lowest amperage setting initially, then increase if needed, observing the battery’s voltage.
Allow ample time for a full charge – typically several hours – monitoring the LED indicators. This method is gentler on the battery, extending its lifespan. Regularly check the battery’s temperature during the process to ensure safe operation and prevent damage.
Fast Charging Mode (If Applicable)
If your Die Hard charger features a fast charging mode, use it cautiously for batteries in good condition with a moderate discharge. This mode delivers a higher amperage, significantly reducing charging time. However, it generates more heat, potentially damaging the battery if misused.
Monitor the battery’s voltage and temperature closely throughout the fast charge cycle. Avoid using this mode for older or heavily sulfated batteries. Discontinue fast charging if the battery becomes excessively warm, switching to standard mode instead for a safer, slower charge.

Trickle Charging Mode
The trickle charging mode on your Die Hard charger is designed for maintaining a fully charged battery over extended periods. It delivers a very low amperage, compensating for the battery’s natural self-discharge rate. This prevents sulfation and keeps the battery ready for use.
Trickle charging is ideal for batteries used infrequently, like those in seasonal vehicles or emergency power systems. Regularly check the battery’s voltage while in trickle mode to ensure it remains adequately charged. Avoid prolonged trickle charging of a deeply discharged battery; first, bring it up to a partial charge using standard mode.
Understanding Charging Amperage & Voltage
Charging amperage dictates the rate at which energy is delivered to the battery, while voltage represents the electrical potential difference. Higher amperage charges faster, but excessive amperage can damage the battery. Your Die Hard charger automatically adjusts amperage based on battery type and condition.
Voltage must match the battery’s specification (typically 12V or 6V). Incorrect voltage can lead to undercharging or overcharging, both detrimental to battery health. Monitoring these parameters ensures optimal charging and extends battery lifespan. Understanding these concepts is vital for safe and effective battery maintenance.
Troubleshooting Common Issues
If the charger fails to power on, check the power cord connection and ensure the outlet is functioning correctly. A battery not charging could indicate reversed polarity, a faulty connection, or a deeply discharged battery. Overheating suggests a ventilation issue or a potential charger malfunction – immediately disconnect it.
Review the LED indicators for error codes. If problems persist, consult the warranty information. Never attempt to disassemble or repair the charger yourself; doing so voids the warranty and poses a safety risk. Prioritize safety and proper diagnosis.
Charger Not Powering On
If your Die Hard charger doesn’t illuminate or operate, begin by verifying the AC power cord is securely connected to both the charger and a functioning wall outlet. Test the outlet with another device to confirm it’s providing power. Inspect the power cord for any visible damage, such as cuts or fraying.
Check the charger’s internal fuse (if applicable) and replace it if blown. Ensure the on/off switch is in the ‘on’ position. If these steps fail, the charger may have an internal fault requiring professional service or replacement.
Battery Not Charging
If the Die Hard charger powers on but the battery isn’t receiving a charge, first confirm a solid connection between the charger clamps and the battery terminals. Ensure correct polarity – red to positive (+), black to negative (-). Clean corroded terminals as this hinders current flow.
Verify the charger’s voltage and amperage settings are appropriate for the battery type and condition. A severely discharged or sulfated battery may require a longer charging time or a desulfation mode (if equipped). If issues persist, the battery itself may be faulty and unable to accept a charge.
Overheating Issues
Should your Die Hard battery charger become excessively hot during operation, immediately disconnect it from both the battery and the power outlet. Overheating indicates a potential malfunction, posing a safety risk. Ensure adequate ventilation around the charger; avoid enclosing it or placing it on flammable surfaces.

Check for blocked vents or internal dust accumulation. A faulty internal component, like a transformer or diode, could also cause overheating. Do not attempt to disassemble or repair the charger yourself; contact qualified service personnel for assistance and inspection.
Maintenance & Storage
To ensure the longevity and reliable performance of your Die Hard battery charger, regular maintenance is recommended. Periodically clean the charger housing with a damp cloth, removing any dust or debris. Inspect the charging cables for damage – cracks, fraying, or exposed wires – and replace them if necessary.
When storing the charger for extended periods, disconnect it from the power source and coil the cables neatly to prevent damage. Store it in a cool, dry environment, away from direct sunlight and extreme temperatures. Proper storage safeguards against corrosion and component degradation.
Cleaning the Charger Housing
Maintaining a clean charger housing is vital for safe and efficient operation. Before cleaning, always disconnect the Die Hard battery charger from the power outlet. Use a slightly damp cloth – avoid excessive water – to wipe down the exterior surfaces. A mild detergent solution can be used for stubborn dirt, but ensure it’s thoroughly rinsed and the housing is completely dry before reconnecting.
Never immerse the charger in water or use abrasive cleaners, as these can damage internal components. Regular cleaning prevents dust buildup, which can lead to overheating and reduced performance, extending the charger’s lifespan.
Proper Cable Storage
Correct cable storage is crucial for preventing damage and ensuring the longevity of your Die Hard battery charger’s cables. After each use, fully coil the charging cables, avoiding tight bends or kinks that can compromise the internal wiring. Store the cables in a dry, clean location, away from extreme temperatures and direct sunlight.
Avoid wrapping cables around the charger itself, as this can create stress points. Utilize cable ties or Velcro straps to secure the coils. Inspect cables regularly for any signs of wear and tear, and replace them if damaged to maintain safe operation.
Battery Desulfation Feature (If Equipped)
Some Die Hard battery chargers include a desulfation feature designed to recover batteries with sulfate buildup on the lead plates. This process applies a specific voltage and current to break down the sulfate crystals, restoring battery capacity. However, desulfation isn’t always successful, particularly with severely damaged batteries.
To utilize this feature, select the desulfation mode (if available) and follow the charger’s instructions. Monitor the process closely, as prolonged desulfation can potentially overheat the battery. This feature is best used on batteries that have been infrequently charged or stored for extended periods.
Understanding Battery Death & Failure
Battery failure can stem from various causes, including internal shorts, plate sulfation, and physical damage. A “dead” battery may no longer accept a charge, exhibiting a consistently low voltage. Recognizing the signs of failure is crucial; these include inability to hold a charge, visible corrosion, or a bulging case.
Sulfation, a common issue, occurs when lead sulfate crystals build up on the plates, hindering chemical reactions. Repeated deep discharges accelerate this process. While a charger with a desulfation feature might help, severely damaged batteries often require replacement. Ignoring these signs can lead to further complications.
Causes of Battery Failure (Die)
Several factors contribute to battery failure, often referred to as “dying.” Extreme temperatures, both hot and cold, significantly reduce battery capacity and lifespan. Repeated deep discharging weakens the internal structure, leading to sulfation – the buildup of lead sulfate crystals.
Vibration and physical shock can cause internal plate damage, creating shorts and reducing performance. Corrosion of terminals hinders current flow, while overcharging can lead to electrolyte loss and overheating. Age is also a significant factor; batteries naturally degrade over time, losing their ability to hold a charge effectively.
Recognizing a Dead Battery
A truly dead battery exhibits several telltale signs. The most obvious is an inability to start the vehicle or power the intended device, even after repeated attempts. A significantly low voltage reading – typically below 12.0 volts – indicates a depleted state. Visible physical damage, such as bulging or cracking, is a clear warning sign.
The battery may also show no response during charging, or accept a charge but quickly lose it. Internal shorts can cause excessive heat generation during charging attempts. If these symptoms persist, the battery is likely beyond recovery and requires replacement for safe and reliable operation.
Die Area & Yield (Related to Charger Component Quality)
The “die” refers to the small silicon unit containing the charger’s integrated circuits. Larger die areas can accommodate more complex designs, potentially enhancing functionality. However, a larger die also increases the probability of defects during manufacturing. Yield, representing the percentage of functional dies per wafer, directly impacts production cost and charger reliability.
Defect density, calculated using a Poisson model (e-DA, where D is defect density and A is die area), is a critical metric. Lower defect densities correlate with higher yields and improved charger performance. Rigorous quality control minimizes defects, ensuring consistent and dependable operation of your Die Hard charger.
Defect Density & Charger Reliability
Defect density, a crucial indicator of component quality, directly influences the long-term reliability of your Die Hard battery charger. A lower defect density signifies fewer flaws within the semiconductor material, minimizing the risk of premature failure. These defects can manifest as intermittent operation, reduced charging efficiency, or complete charger malfunction.
Manufacturers employ stringent quality control measures to minimize defect density, including advanced testing and inspection procedures; Higher yields, achieved through lower defect rates, translate to more dependable chargers for the consumer. Ultimately, a charger with a low defect density provides consistent performance and extended service life.
Memory Die Types (B-Die vs. P-Die ─ Relevance to Internal Components)
While seemingly unrelated to battery chargers, understanding memory die types – specifically B-die and P-die – offers insight into the quality of internal electronic components. These designations, originating from Samsung memory production, indicate variations in manufacturing processes and resulting performance characteristics. P-die generally exhibits superior performance but comes at a higher cost.
Though not directly impacting charging functionality, the use of higher-quality memory dies within the charger’s control circuitry suggests a commitment to overall product reliability. A charger utilizing robust components, like P-die based memory, is likely to offer more stable operation and a longer lifespan.
Warranty Information & Support
Your Die Hard battery charger is covered by a [Specify Warranty Duration ー e.g., one-year] limited warranty against defects in materials and workmanship from the date of original purchase. This warranty does not cover damage resulting from misuse, abuse, or unauthorized modifications. Proof of purchase is required for all warranty claims.
For warranty service or technical support, please contact our customer support team at [Phone Number] or visit our website at [Website Address]. We offer comprehensive troubleshooting resources and assistance to ensure your satisfaction. Retain this manual for future reference.